

Wavy II
Karen Theisen Arts
415-786-6412
Sept 7, 2022
KP Vacaville Installation Instructions
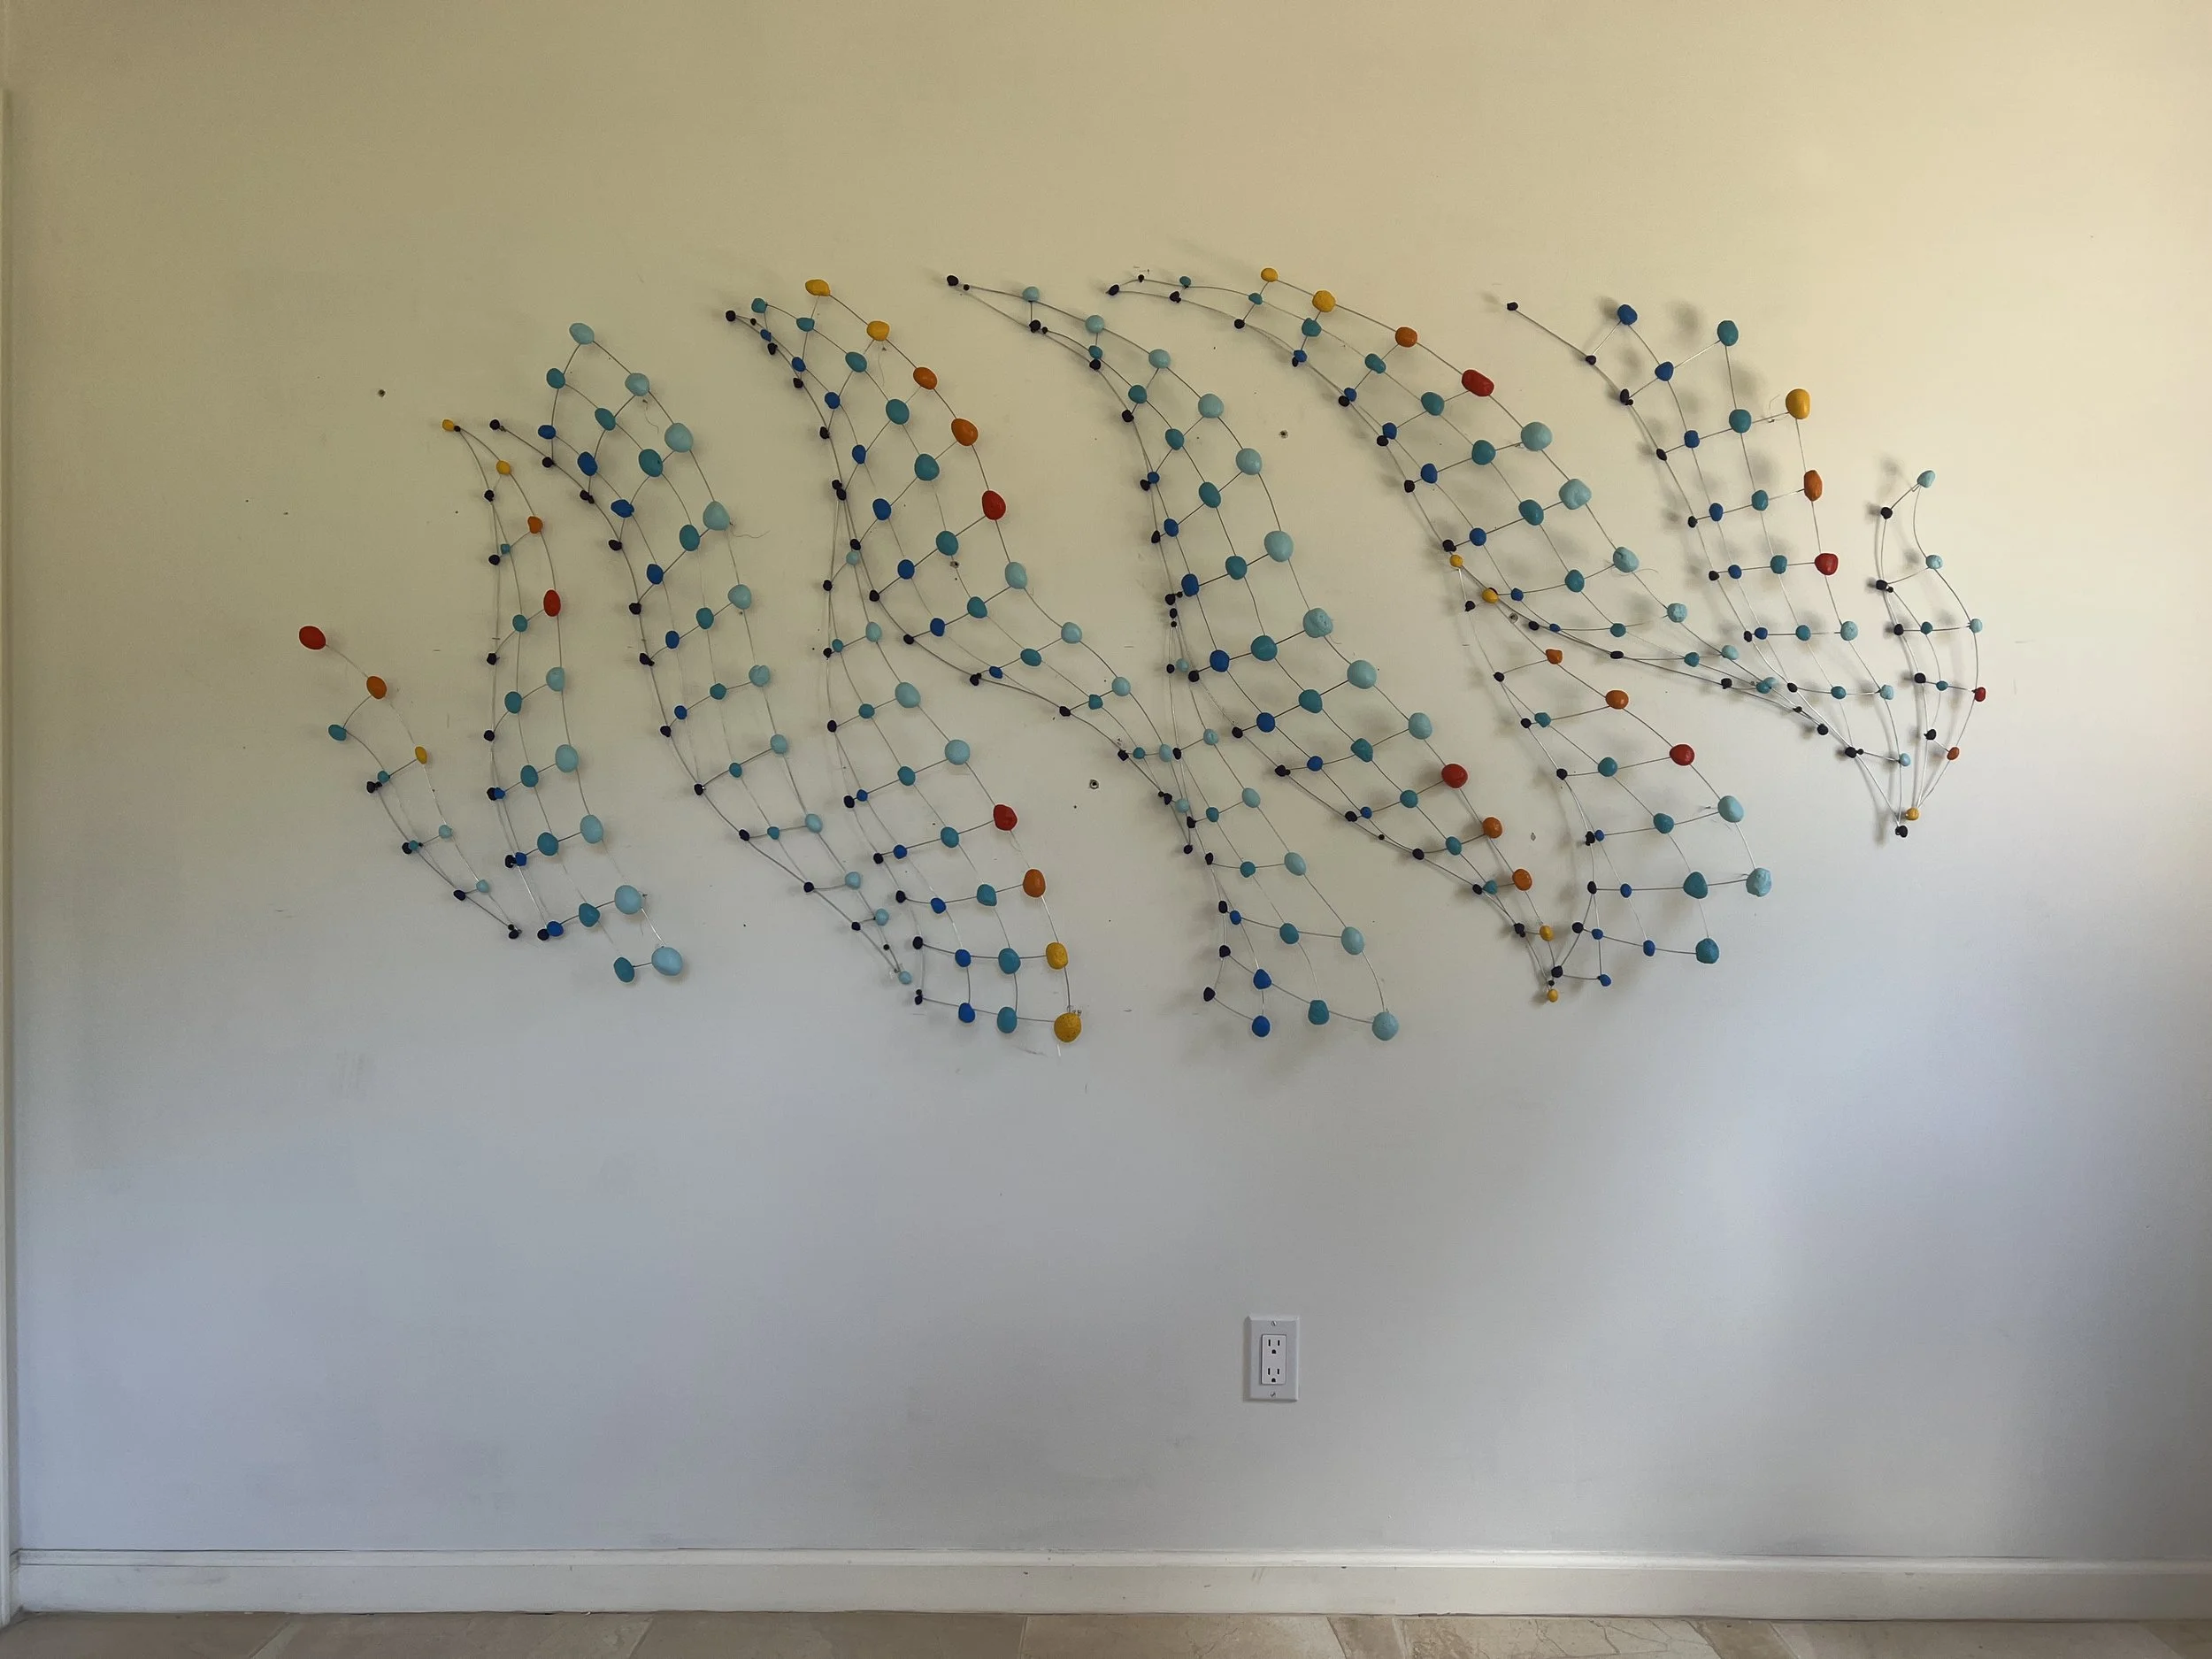
The 87” w by 40” h by 4” d wall sculpture is made up of 11 sections. Wavy II is shipped in two boxes. One box holds 5 sections, the other box holds 6 sections.
Box 1 contains the pattern to be used to install it on the wall. It is taped onto the top edge of the foam core in Box 1 with green tape. Box 2 contains these instructions that are taped onto the top edge of the foam core with green tape. Also included are several extra rocks in a white envelope taped with green tape.
Steps:
Remove the cardboard structure from the boxes using the handles.
Remove the yellow twist ties that keep the sections attached to the cardboard structure.
Remove each section from the cardboard structure. Note that there are loose wires sticking out from the back of each section attached with pink twist ties. These will be used to attach the side of the sections that sticks out from the wall to the wall.
Carefully cut the pink tape holding the bubble wrap onto each section being careful not to scratch the rocks. Remove the bubble wrap.
Tape the pattern on the wall in the desired location. The pattern is marked with “Top” and “Bottom” and “Left” and “Right” to indicate orientation.
The sections are numbered on the pattern. The solid lines indicates the left side of the section where it is attached and lays flat against the wall. The dotted line indicates where the side that sits away from the wall is located. There are 9 pieces numbered on green tape from #1 to #9 and two end pieces marked “A” (left side) and “B” (right side). Each section indicates which end is the top.
Attach the sections to the wall on top of the pattern corresponding to each section. The sections should be attached with clips in the cutout out sections in the pattern labeled “clip”. The size of the clips I used to mark off each cutout were approximately 3/8” by about 5/8” long, the smaller the clip, the better.* Note that in general, I placed the location of the clip just below the rock, so that the clip is more hidden. However in certain cases, this wasn’t possible (if it was blocked by a wire for example.)
Attach eye hooks to the wall in the cross hairs marked “nail/hook”. The tops of the rocks should not stick out more than 4” from the wall. (The loose wires that are sticking out from the backs of the sections will attach to these hooks once the pattern is removed.)
Remove the pattern by carefully tearing it out from underneath the sections.
Attach the wires sticking out from the backs of the sections to the eye hooks. Note that about three sections have a thick wire sticking out that will be perpendicular to the wall when installed, this keeps the section away from the wall at the right distance.
Please take a photo after its installed. Or perhaps Mary Ann could take one.
Thanks for all of your help!!!
Please see this link for photos of what it should look like after its installed:
https://www.karentheisenarts.com/wavyinstall
If you need to reach me for questions or anything, please don’t hesitate to call me, Karen Theisen, at 415-786-6412. Thanks!
See this product for an idea about a possible clip. This one is plastic but if something similar could be found in metal, that would be great. The size of these clips is small which I like. It would be great to paint the clips to match the color of the wall if possible, that way they will disappear visually.
https://www.amazon.com/Hicarer-R-Type-Mounting-Fastener-Management/dp/B07DFD5X14/ref=sr_1_28?crid=2BBFRCHTFVDGI&keywords=transparent%2Bscrew%2Bwire%2Bfastener&qid=1661976891&s=electronics&sprefix=transparent%2Bscrew%2Bwire%2Bfastener%2Celectronics%2C94&sr=1-28&th=1